Tutorial 3
Purpose
The purpose of this third tutorial is to go into the more advanced functionalities of the Geospatial Microplanning Toolkit (GMT). Previous knowledge is required - you are expected to have worked through Tutorial 1 and Tutorial 2 and that you understand all concepts introduced there.
This tutorial will follow the same principle as the previous two, and additionally we will introduce the following:
Settlement splitting
Settlement merging
Review the attention tab
Let’s Get Started!
Preparation
Obtain the data for Ward “Oke-Ode 3” in LGA “Ifelodun” in the State “Kwara” and take the data offline. Navigate to the health facility list. If any of those steps pose trouble, consult the steps in Tutorial 1.
Splitting a settlement
Without going into detail here, buildings have been aggregated into settlements with certain rules. If you want to understand this better, you can consult Background.
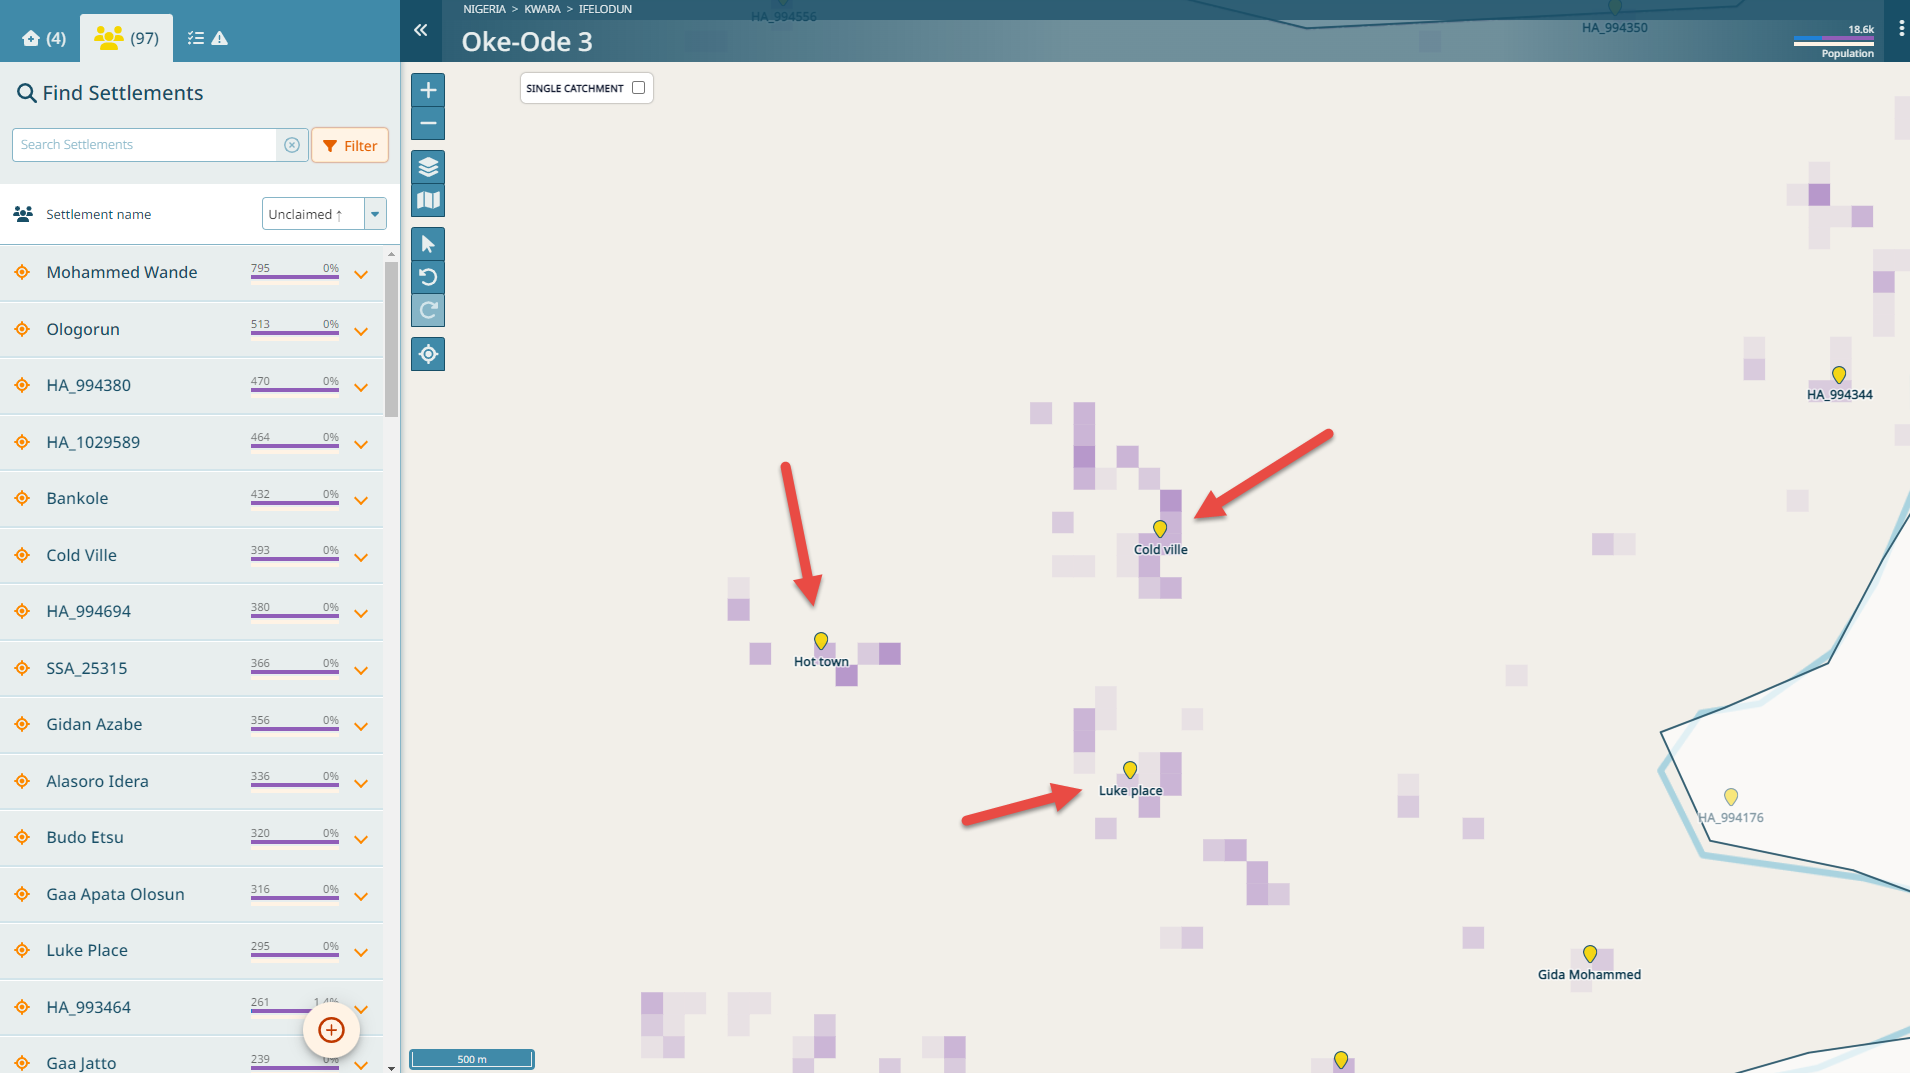
These aggregation rules may result in settlements whose boundaries may not be the boundaries that are used to refer to different places. Thus, sometimes a better delineation may be needed or useful. For instance, let’s consider SSA_25324. Zoom to this settlement. Let’s assume that in this area there are actually a bunch of settlements, with the following names:
Hot town
Cold ville
Luke place
How to deal with this? We first need to better understand what areas are referred under SSA_25324. For that, activate the ‘Boundaries’ from the legend. This allows you to see where there are settlement boundaries. However, we can’t know the border between SSA_25324 and ‘Gida Mohammed’, for instance.
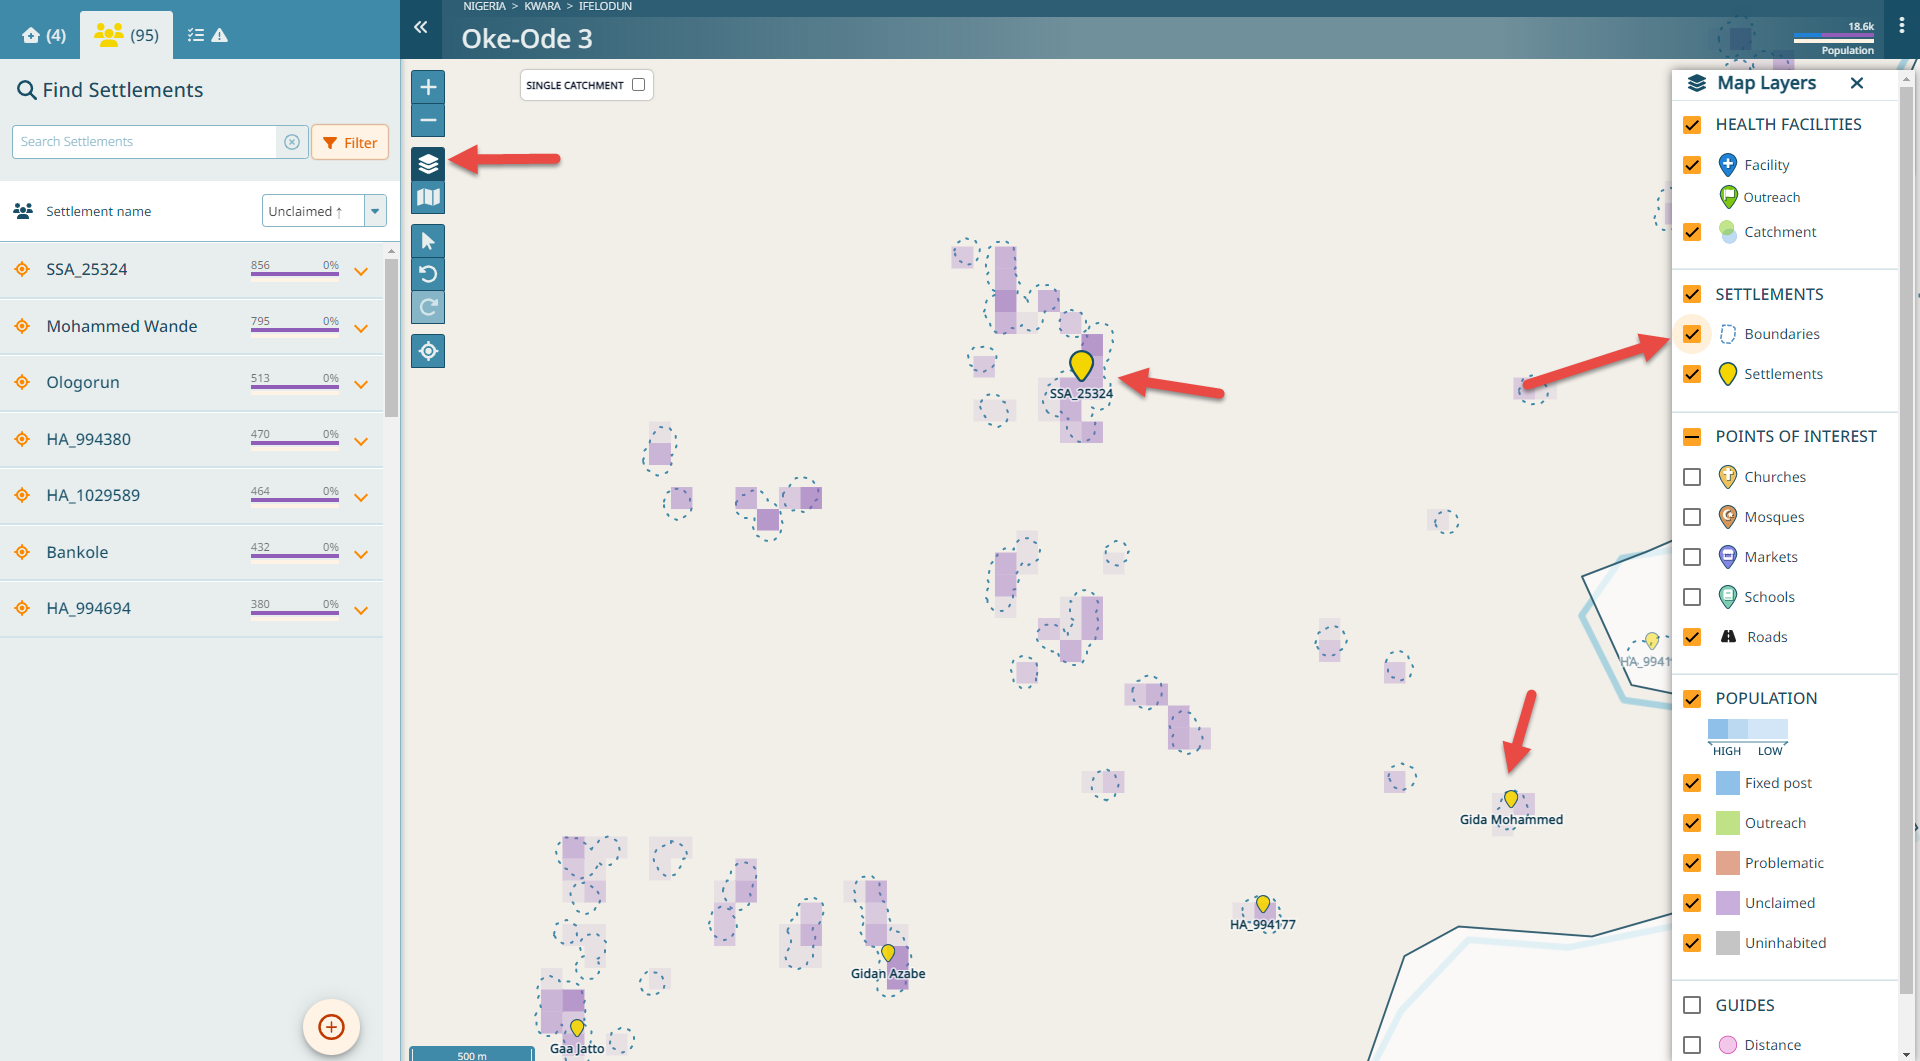
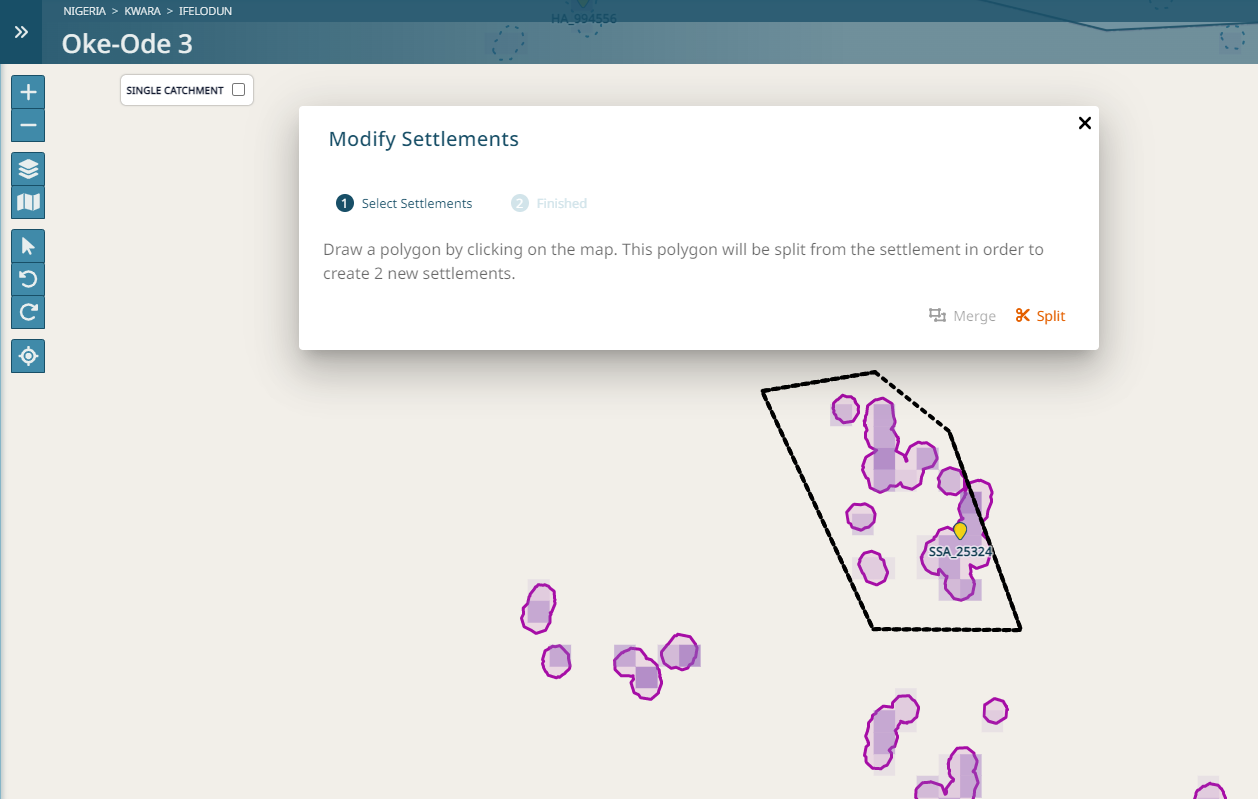
If we wish to delineate our three places as described above, we can do so by selecting the mouse button on the map. Do so and select the settlement close to the name SSA_25324. You see that the settlement is now highlighted.

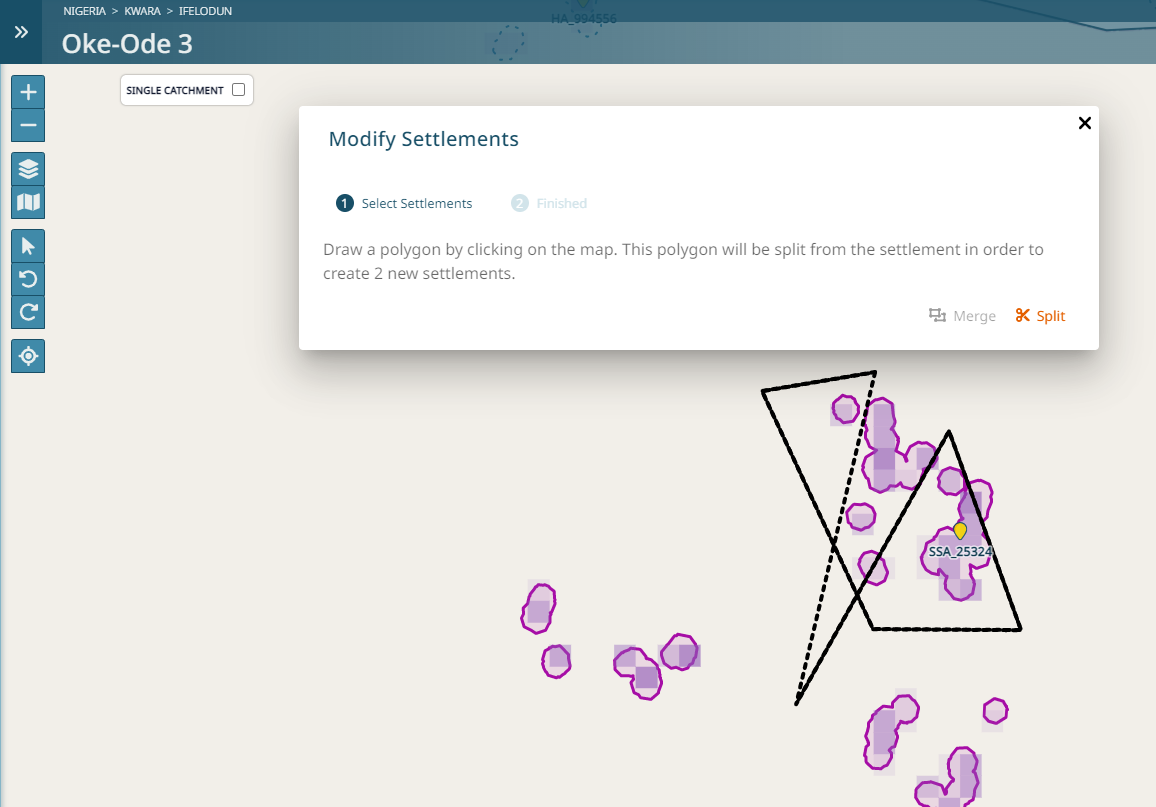
Let’s imagine that the northern part is ‘Cold ville’. Let’s split it accordingly - select ‘Split’. Draw a boundary around the part you want to isolate and name it accordingly. Be careful to include the full shape, otherwise some parts will still belong to the other cut part. Finish the polygon by double-clicking.
Then repeat the same step for the the western and eastern parts (‘Hot town’ and ‘Luke place’, respectively).
Not like this - include the full shape:
Not like that - avoid intersections:
Merging settlements
In a similar fashion that some of the buildings have not been split properly into settlements through the automated processing, there may be cases where buildings have not been assigned to the same settlement, even though they are part of the same settlement. In that case, we would like to merge settlements.
Let’s take a look at ‘Gaa Usman Aiyetoro’ and ‘Gaa Aiyetoro Bankole Issa’. Maybe this area has now grown into one single settlement that is referred to as ‘Gaa Usman Aiyetoro’. Thus, we can merge these two settlements to one.
Click on the mouse button on the map. Select the two settlements - observe that the now there is only the merge option available. Click on ‘Merge’. You will now have to choose which of the names apply.
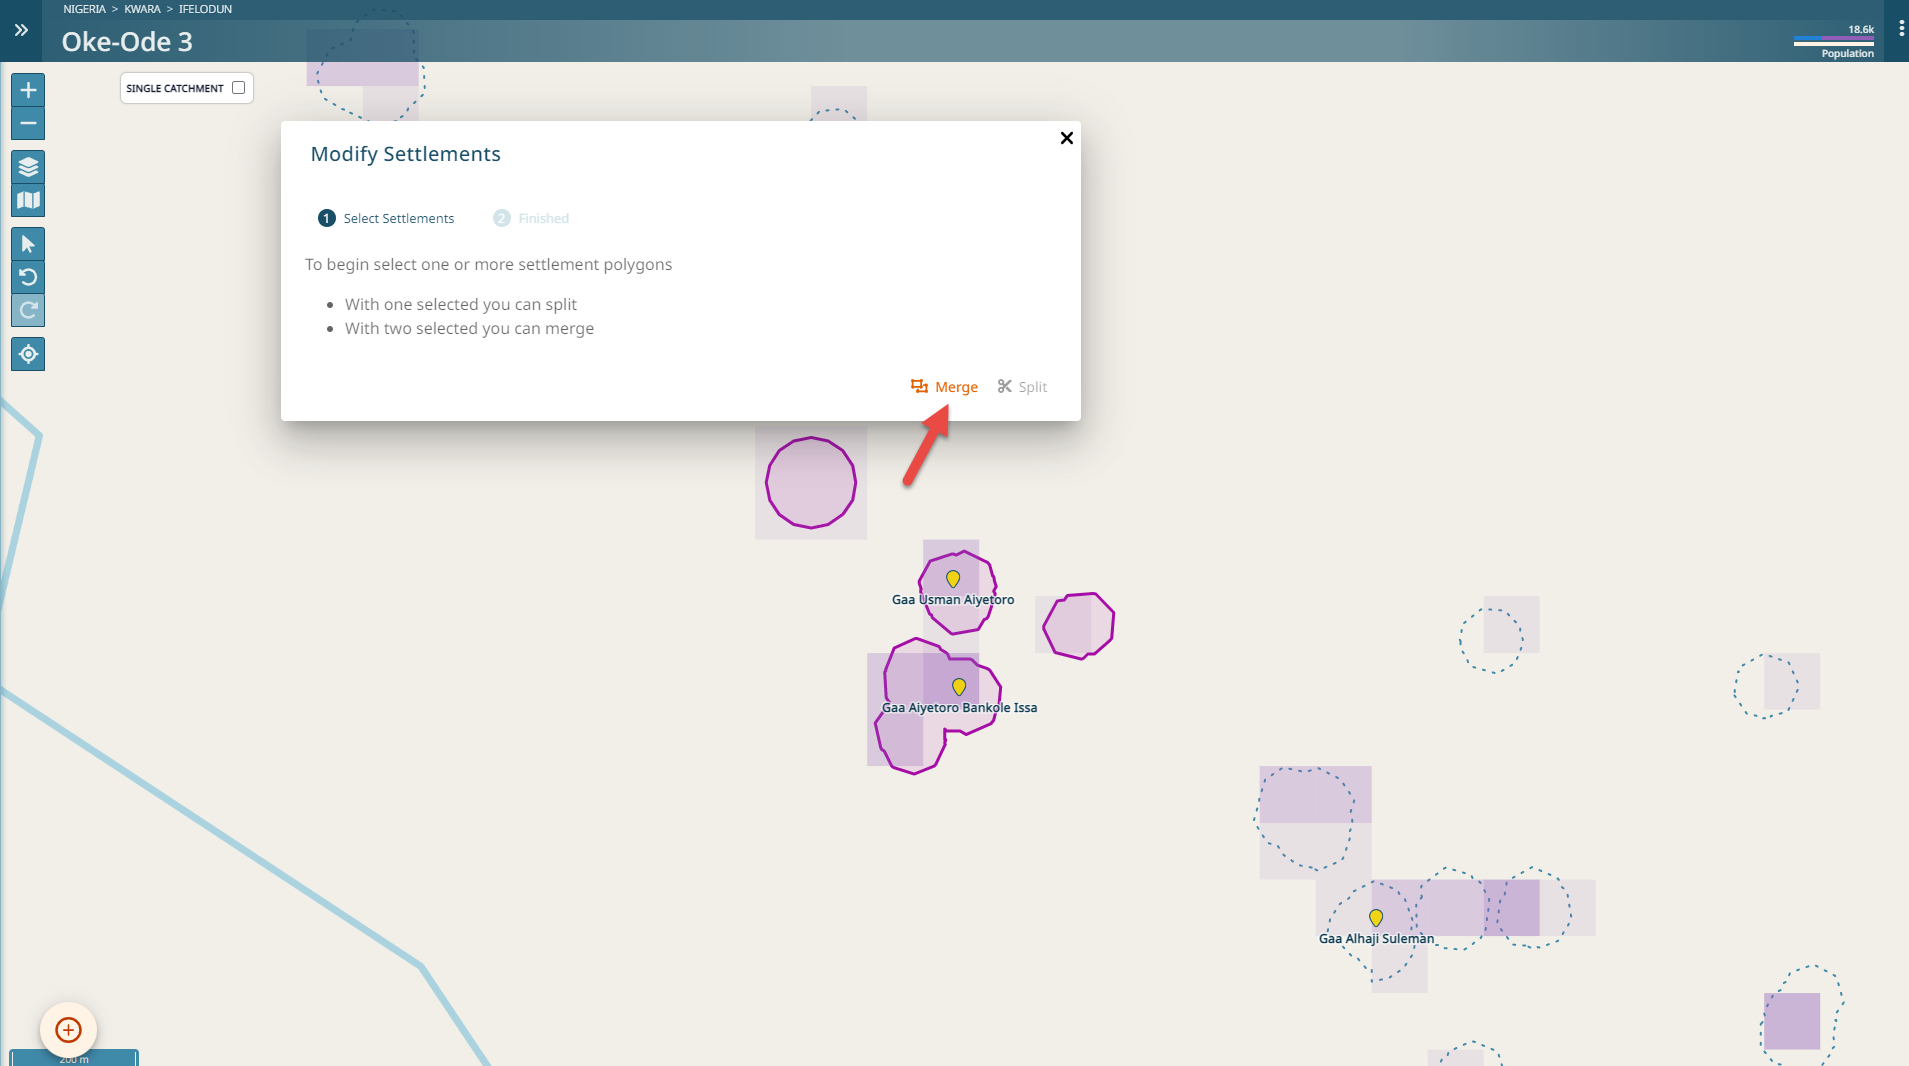
Hint
If one of the names that you are merging is a machine generated name, the merged name will automatically be a real name as long as there is one.
Review the attention tab
We have already covered a good part of the application so far. One part that we have not yet looked at is the third tab at the top, next to the settlements tab. This tab is the attention tab.
This tab is a helper that will aid the microplanning completion with four sections.
Base Data Completion
In this section, all settlements and health facilites are listed that still require some additional information, such as a real name for all machine generated settlements or metadata for health facilities.
Geometry Data Completion
This section lists any geometry issues that might arise.
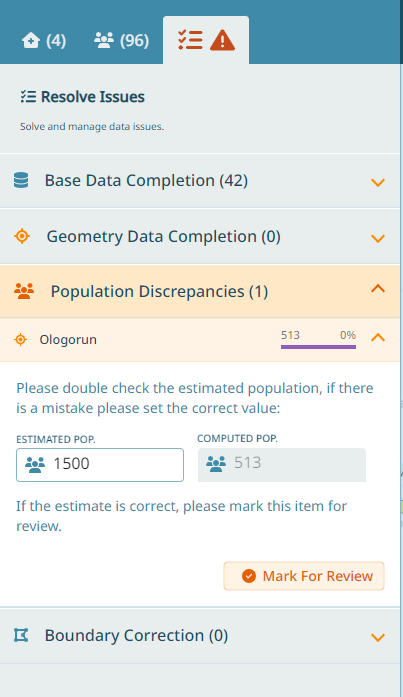
Population Discrepancies
This section highlights whenever there are significant differences between field estimated population and the computed population estimation so that potential settlement delineations can be detected and / or population issues can be quickly detected.
For instance, let’s imagine that someone sets the population in ‘Ologorun’ to 1500 people. Note that this settlement now shows up under the population discrepancy section. You can mark this for review so someone can check if delineation and / or population values here should be updated. Please note that the estimated population values are not used for catchment calculation.
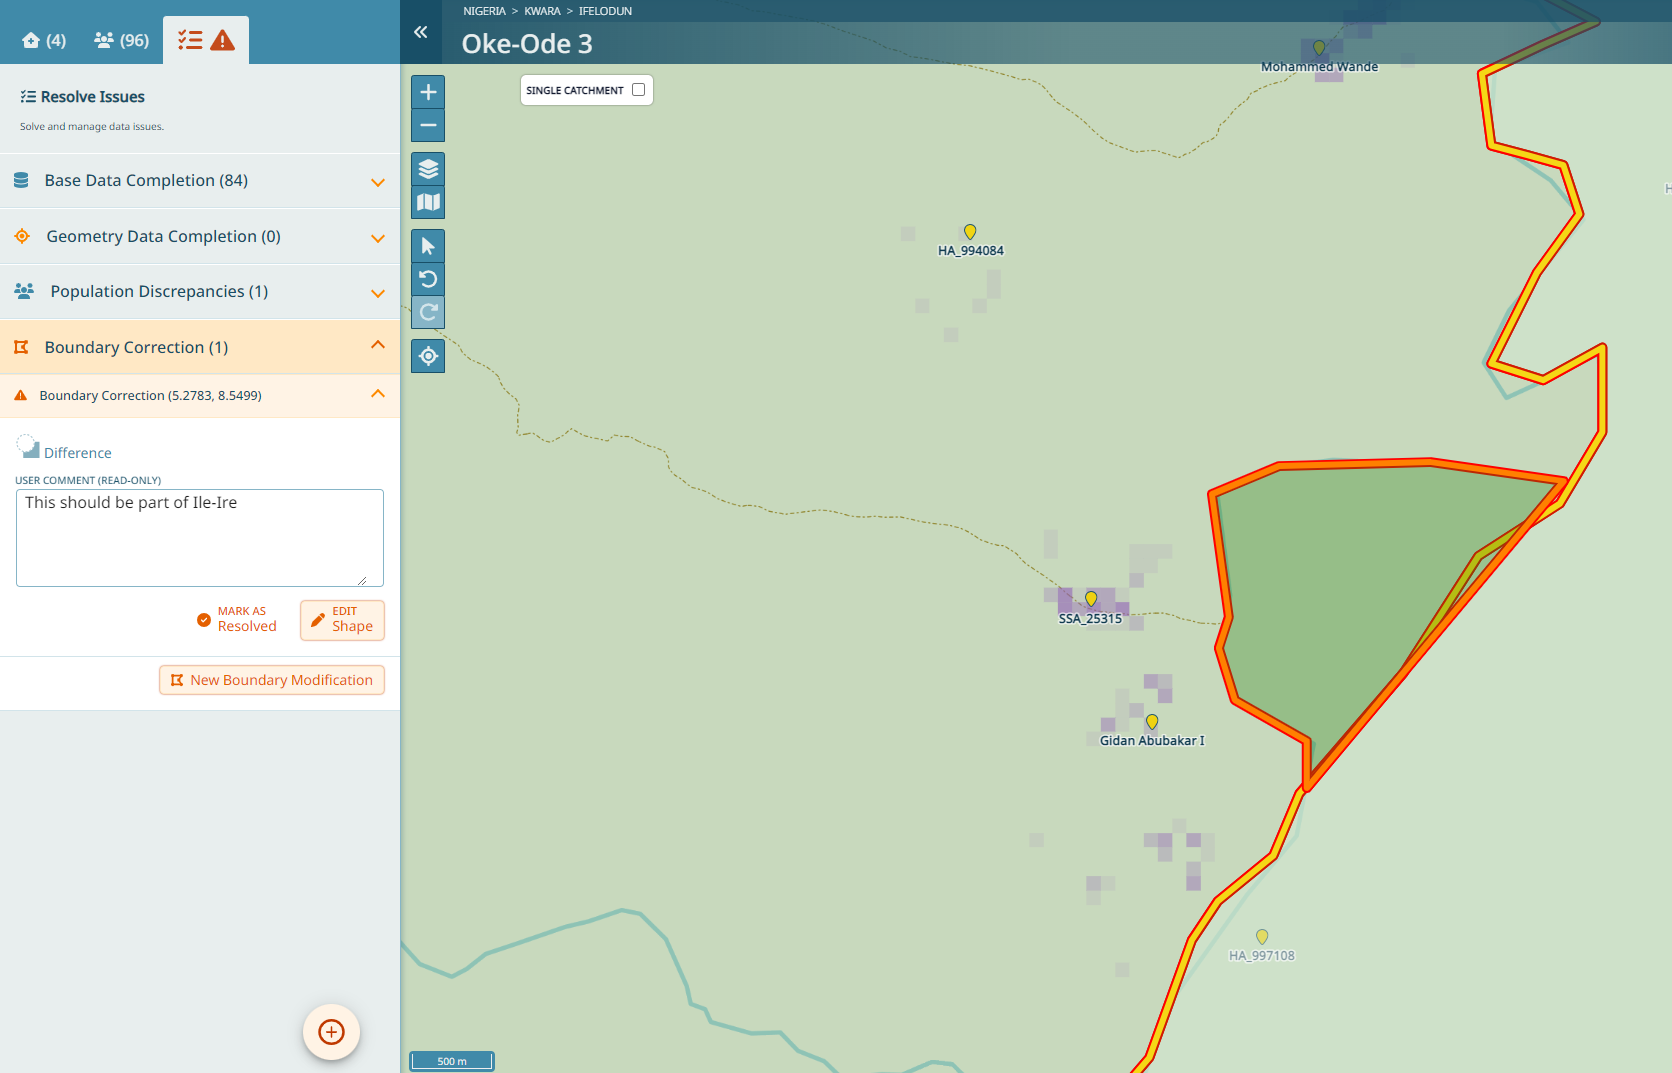
Boundary Correction
Let’s look at the eastern boundary of our Ward. It seems it follows a river. However, when looking at the satellite basemap or OSM basemap, the flow of the river is somewhat different from the boundary - it’s possible that this boundary is not up to date. Thus, let’s correct the boundary.
Click on ‘Boundary Correction’ and then on ‘New Boundary Modification’. Follow the river to correct this boundary. Double click once you have finished the shape. Now you need to select if this part should be added to the Ward or subtracted from it. In our case, the part we delineated should be part of the neighboring Ward instead, so we need to subtract it. Thus, select ‘Difference’. You can optionally also add a comment here - for instance you can specify where this part should go, in case you know: ‘This should be part of the Ward Ile-Ire’.
In case you need to add parts of a neighboring Ward to your Ward, you need to select ‘Union’ in the step where we selected ‘Difference’.
If you want to see the modifications you did, you can click on them once they have been created. The Ward review committee can then review the proposed boundary changes and mark them as resolved. Click on ‘Mark as resolved’. This will apply the change to the boundary.
Important
Ward boundary changes are applied to a separate boundary layer that is not used for catchment calculations of the ongoing rounds. These corrected boundaries are part of the export and can be used to update the geospatial database for the next round of microplanning.
Important
You reached the end of Tutorial 3!