Tutorial 4
Purpose
The purpose of this fourth tutorial is to go into the most advanced functionalities of the Geospatial Microplanning Toolkit (GMT). Previous knowledge is required - you are expected to have worked through Tutorial 1, Tutorial 2 and Tutorial 3 and that you understand all concepts introduced there.
This tutorial will roughly follow the same principle as the previous three, and additionally we will introduce the following:
Health facilities in urban areas
Outreaches in urban slums
Adding settlement names
Custom outreaches
Let’s Get Started!
Preparation
Obtain the data for Ward “Abaranje/Okerube” in LGA “Alimosho” in the State “Niger” and download the data. Navigate to the health facility list. If any of those steps pose trouble, consult the steps in Tutorial 1.
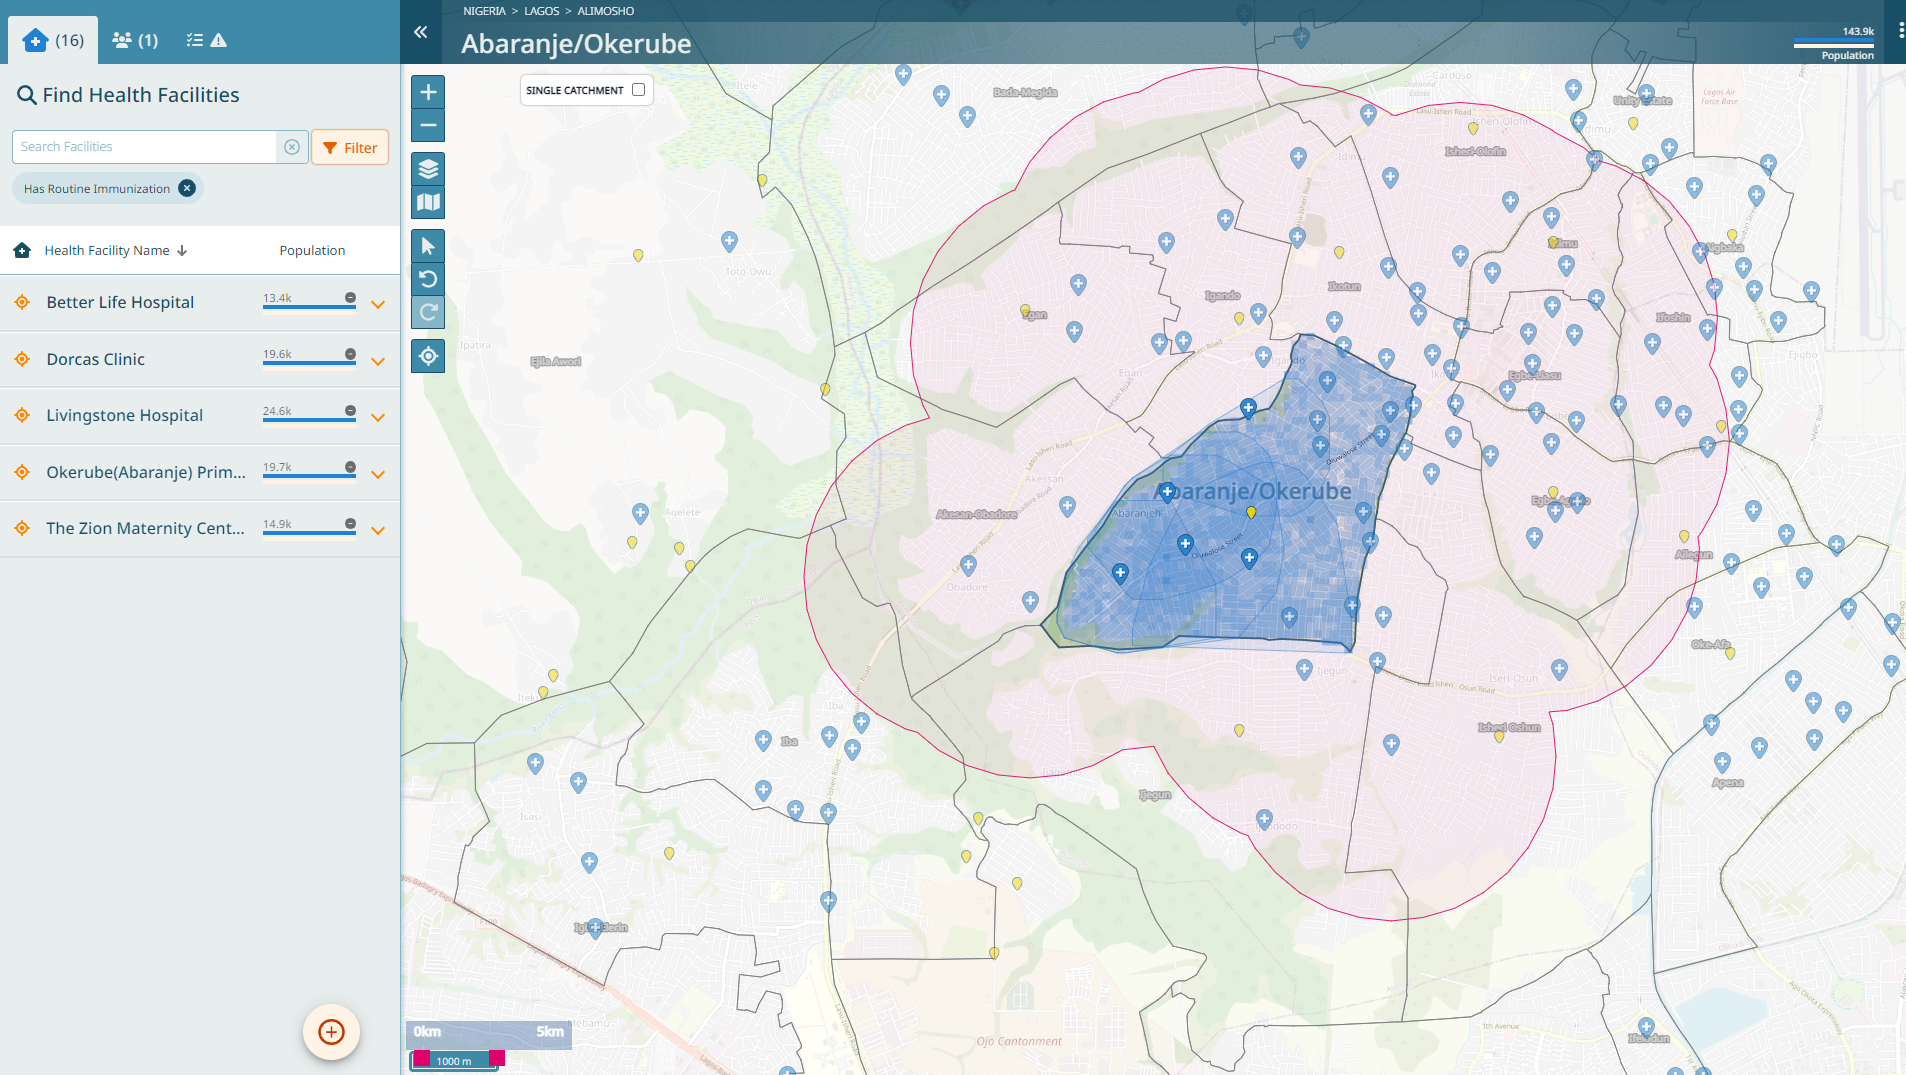
Review the Health Facility list
As you can see, this is an urban Ward with many health facilities. In fact, there are 16 health facilities in this Ward. For the purpose of this tutorial, let’s imagine that the following five health facilities are performing routine immunization services:
Better Life Hospital
Dorcas Clinic
Livingstone Hospital
Okerube (Abaranje) Primary Health Centre
The Zion Maternity Centre
Update the list. You should now have the following list.

Next, let’s have a look at our settlement list.
Review the Settlement list
This is a case where one Ward only has one single settlement.
Looking at the scale bar, we notice that this is a relatively small Ward. The density of health facilities here seems that there is a good coverage. We can check this by using the guides. Activate the “Guides - Distance”. You can see by zooming in and out that no area of the Ward is further than 2km away from a health facility.
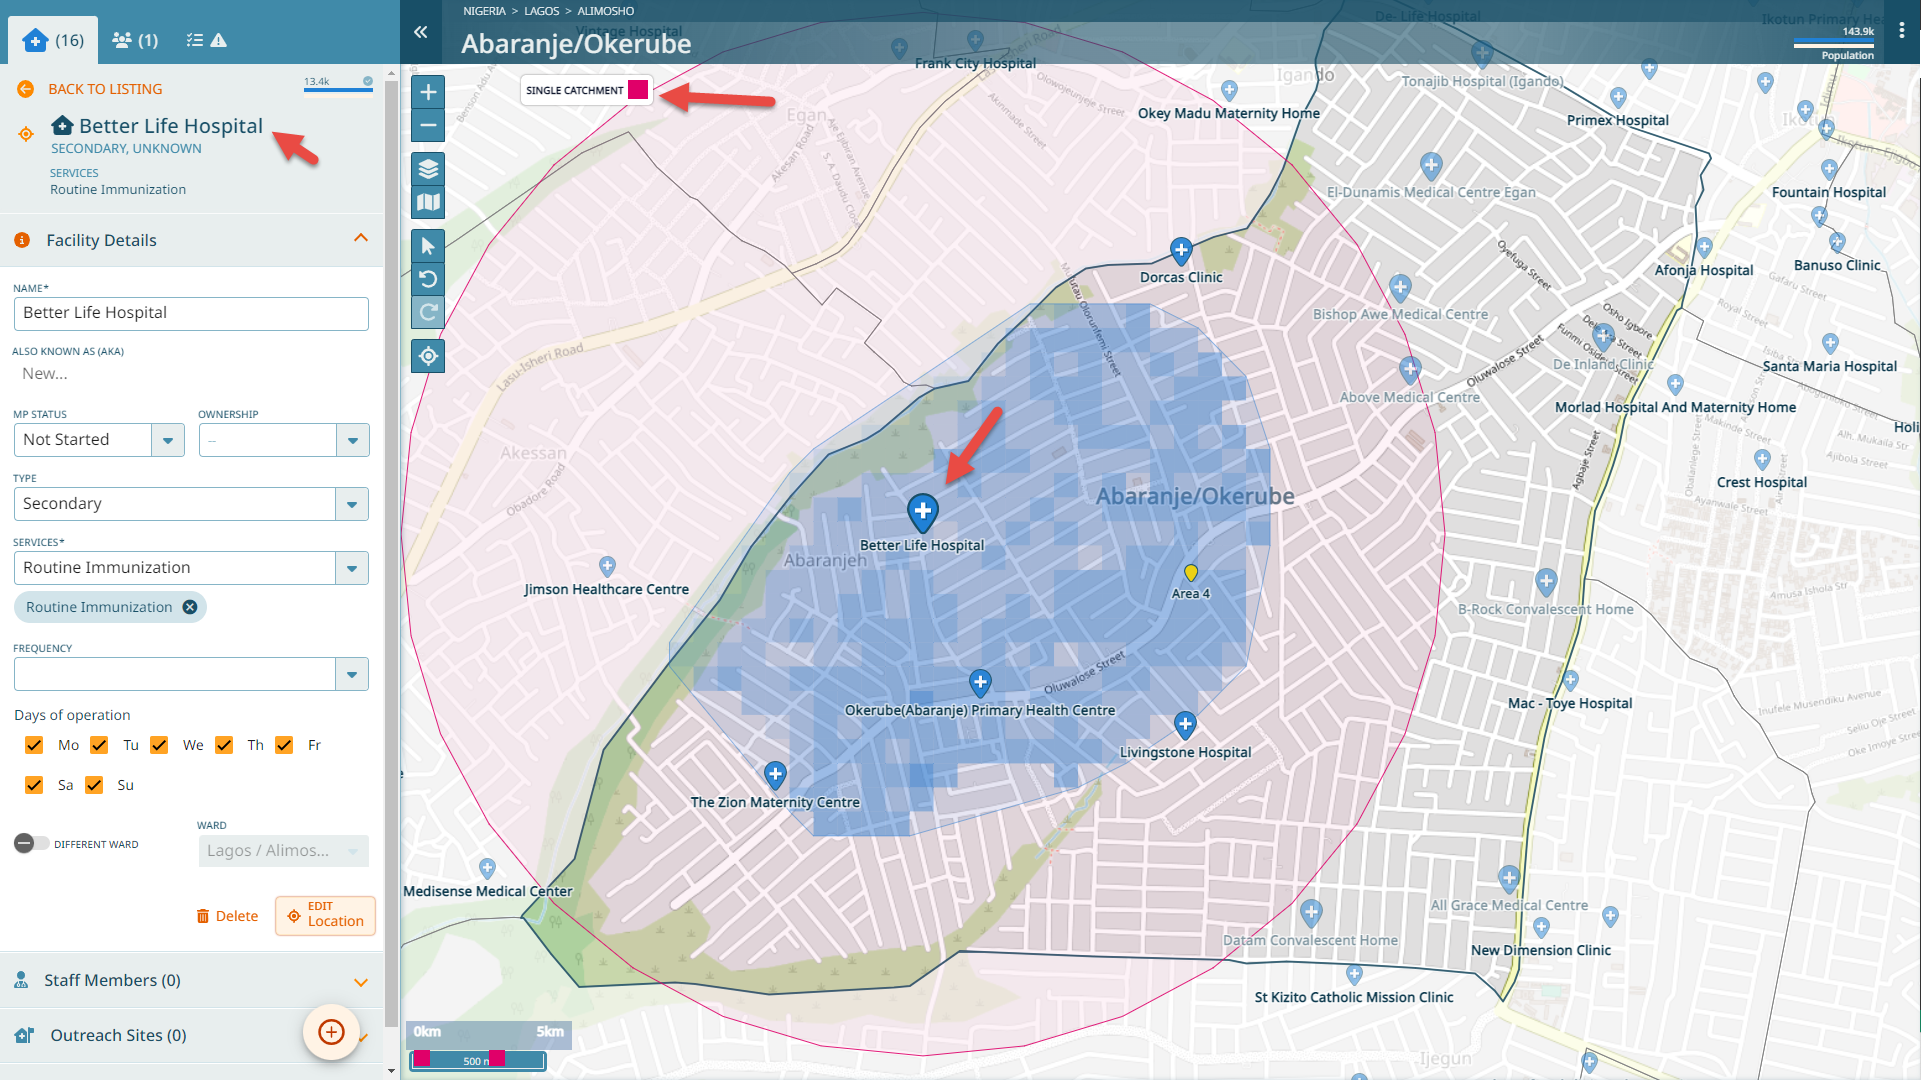
In fact, when you change into the “Single Catchment Mode” you will see that most of the health facilities are less than 2km apart from each other.
To distribute population to each health facility, we weigh a mix of parameters:
Proximity to the health facility
Frequency of services
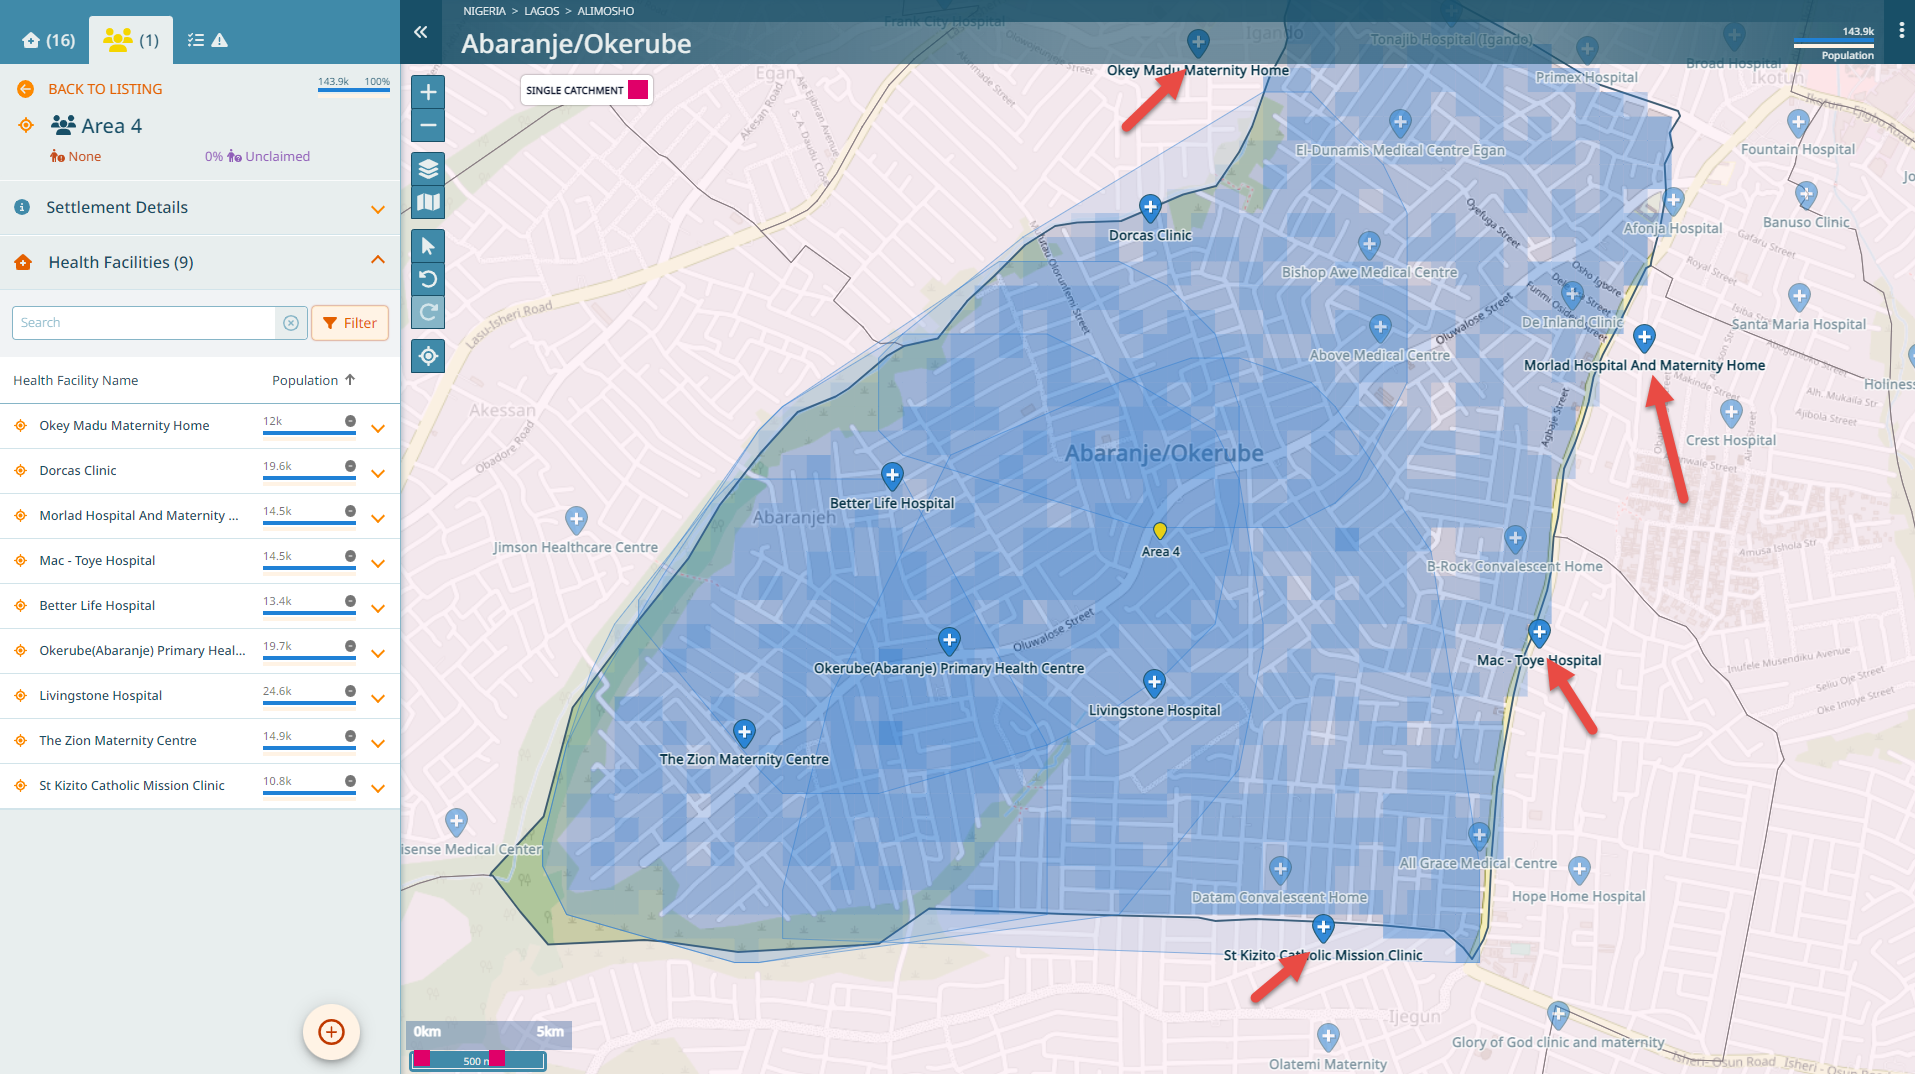
Click on ‘Area 4’ and go to the health facility section of this settlement. Here you see that the population of ‘Area 4’ has been distributed among nine health facilities - including some that are located in another Ward.
Planning outreach sessions within urban areas
Let’s assume that there is a slum area in the South West where ‘The Zion Maternity Centre’ performs an outreach session each Thursday. In this case, we need to delinate the zone where the outreach is performed.
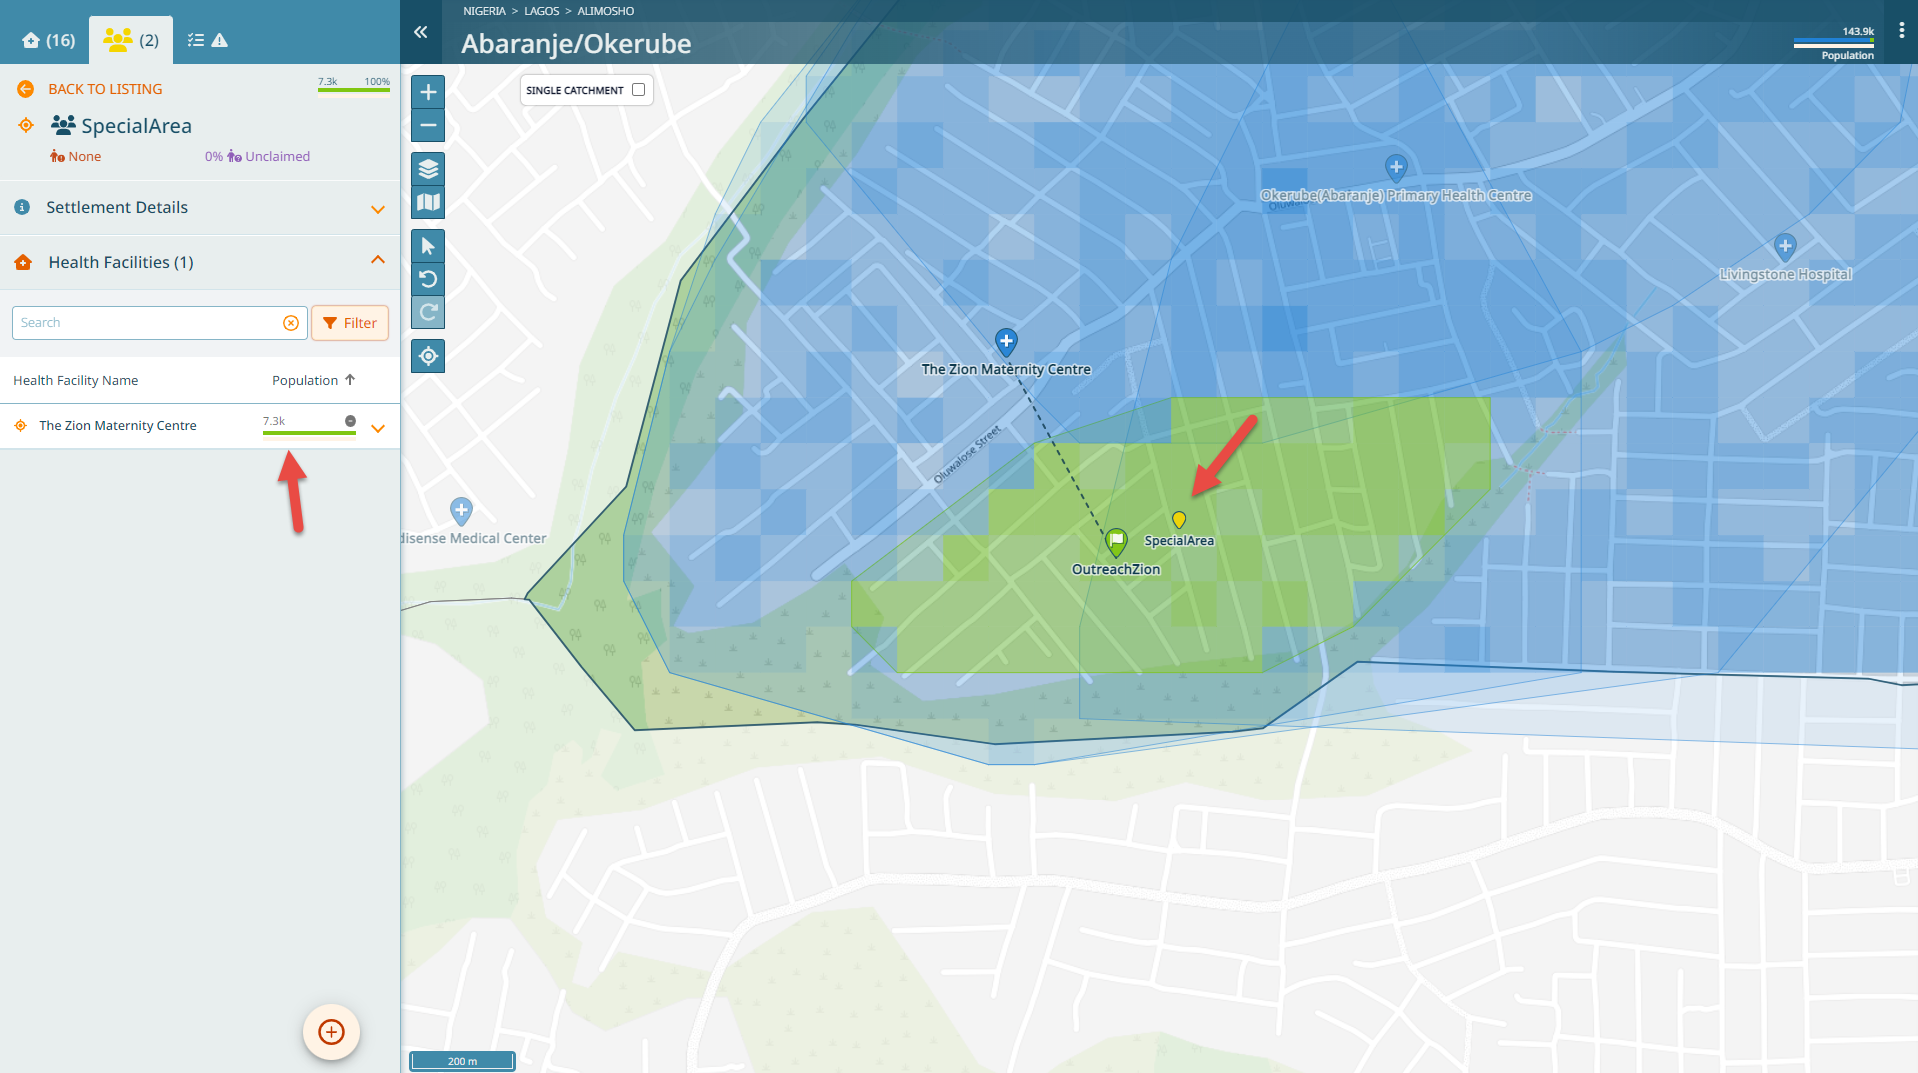
Click on the ‘+’ button and select ‘Outreach Site’. Select ‘The Zion Maternity Centre’ and then set the pin in the South West. You are now being asked to delineate the area. Delineate the area that corresponds to the slum and give it a the name ‘SpecialArea’.
Once you have provided all necessary data and finished the step, you can now see on the Settlement list that you have ‘SpecialArea’ in that list as well. If you click on it, you see that this area is now only serviced by ‘The Zion Maternity Centre’.

Adding a settlement name where there is already a settlement
Let’s further imagine that Area4 is not the area we typically want to refer to. Rather, where ‘The Zion Maternity Centre’ is, we refer to this place as ‘Zion’. Thus, let’s add this name. Click on the ‘+’ button and select ‘Settlement’. Add Zion and set the point close to the health facility ‘The Zion Maternity Centre’. Finish the steps.
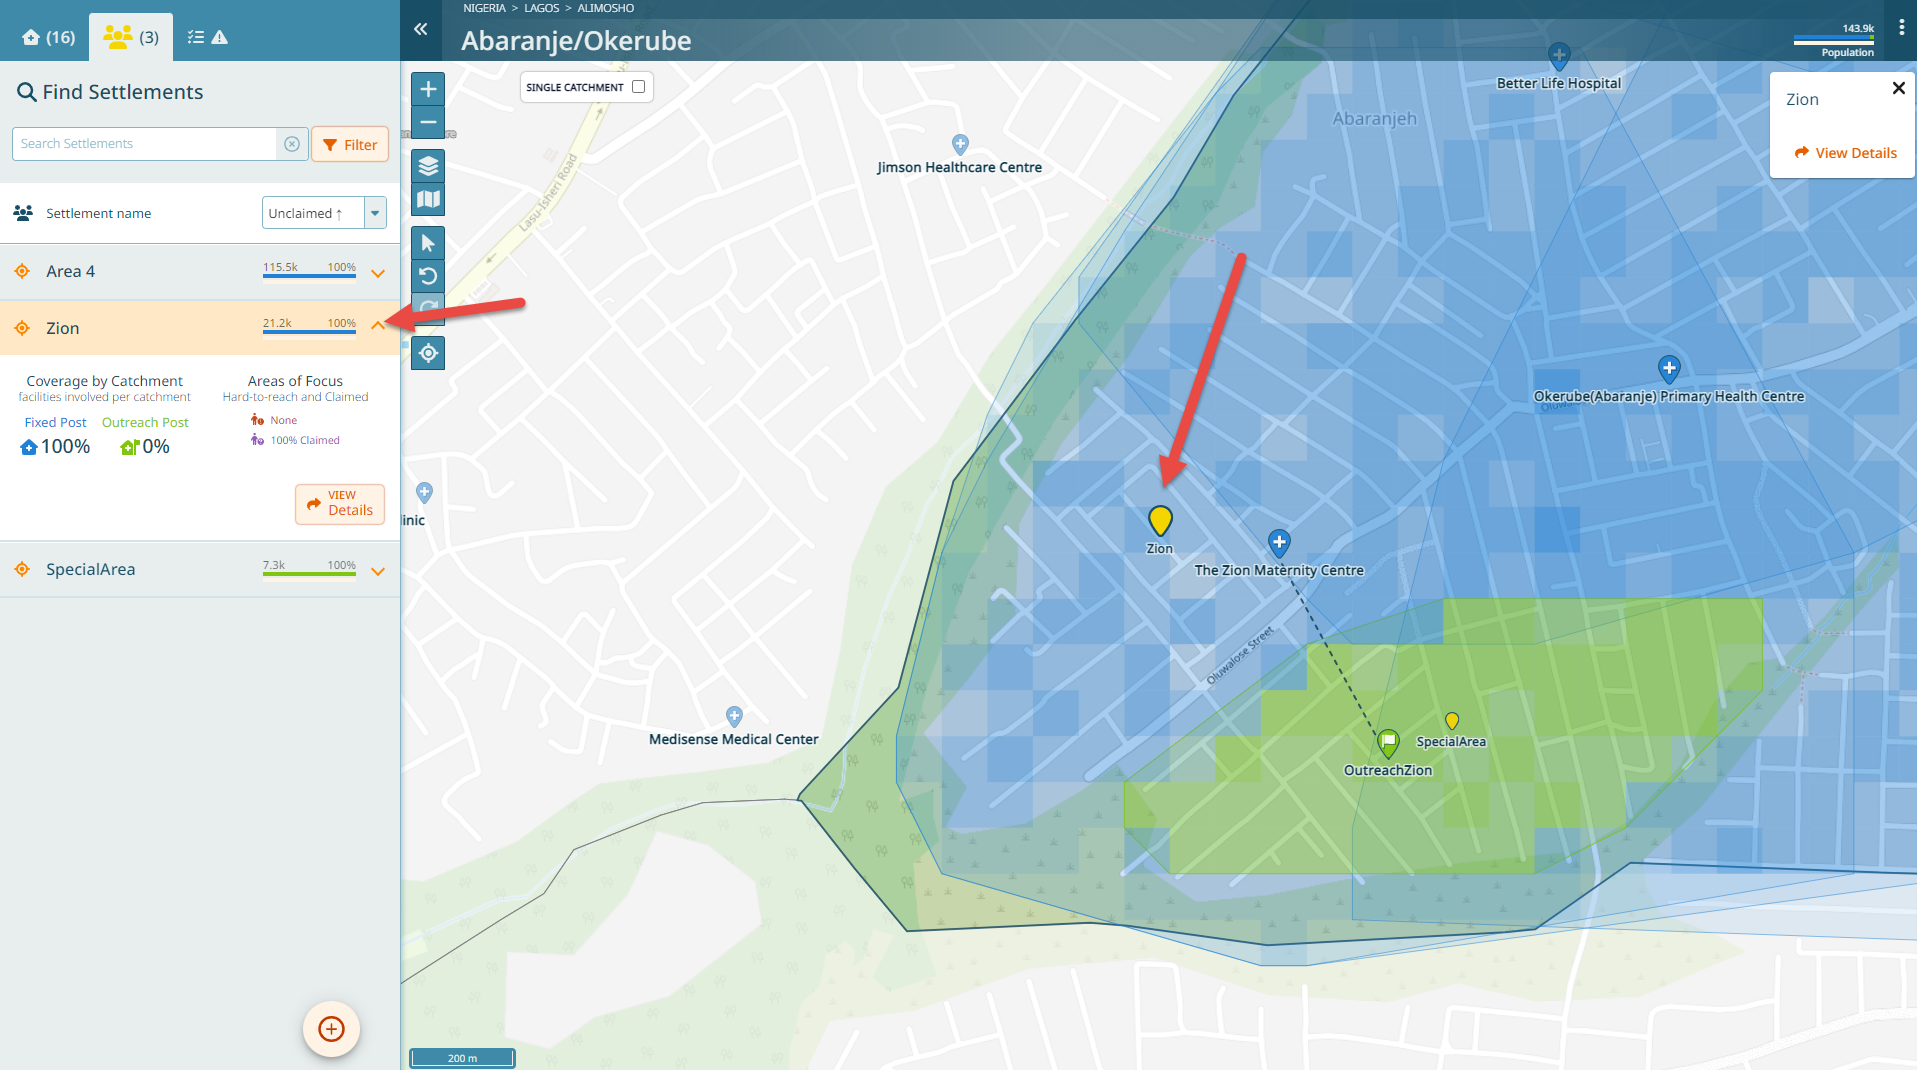
The settlement point has now been added and we can see the settlement in the list along with a popoulation value. The system has automatically attributed this population by splitting the settlement polygon. You can visualize the way the settlement was split: open the legend and deactivate all layers except for the ‘Boundaries’ and ‘Settlements’ section. You see now the area that correspond to each of the names.

Caution
This means that it matters where you place a settlement point, since it is the distance between the settlement points that decides how the boundaries are drawn. You can play around with the ‘Add Settlement’ functionality to better understand this.
Hint
In case you indeed know the boundaries of settlements or places and you don’t want the system to create your boundary for you, use the ‘Draw Boundaries’ feature in the wizard to delineate the actual boundary.
Planning custom outreach sessions
The last section of this tutorial will deal with a separate use case for outreach sites. For this purpose, download the Ward “Gumsuri” in LGA “Damboa” in the State “Borno”.
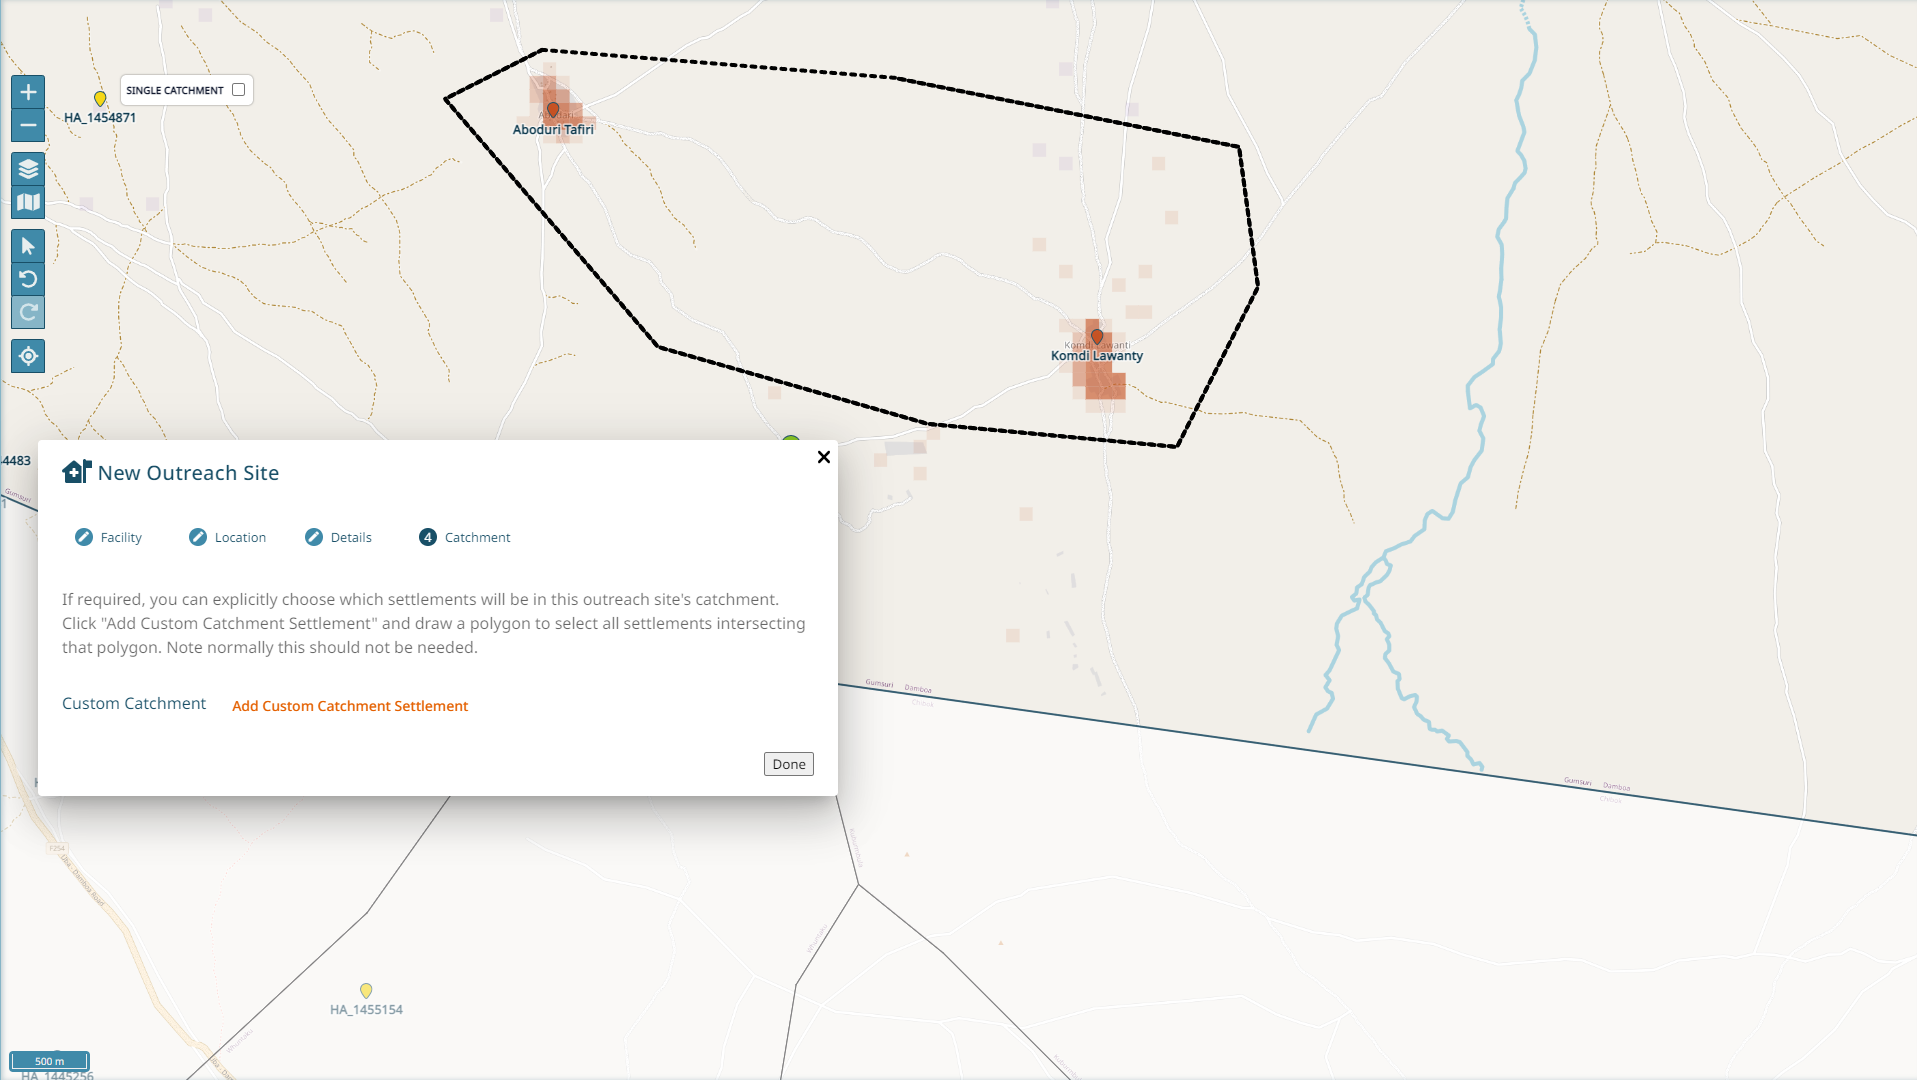
Let’s consider the ‘Kaya Dispensary’. We can imagine that ‘Komdi Lawanty’ and ‘Aboduri Tafiri’ both are security compromised (mark them as such). Thus, an outreach site cannot be placed in this area. However, people will be leaving those places through the roads that go South and West. Thus, an outreach site can be set up at a place where those roads cross.
If you were to set up a normal outreach site in this place (you can try), this will not include those two settlements, since they are further than 2km away from the intersection. However, we can create an outreach site and choose a ‘Custom catchment’ at the last step of creation.

Once you choose this option, you will have to draw on the map the settlements you want to include in the catchment.
Warning
This way you can add settlements in a custom way to an outreach site catchment. This option should only be chosen when a default 2km catchment does not fulfil the reality.

Important
You reached the end of Tutorial 4!